

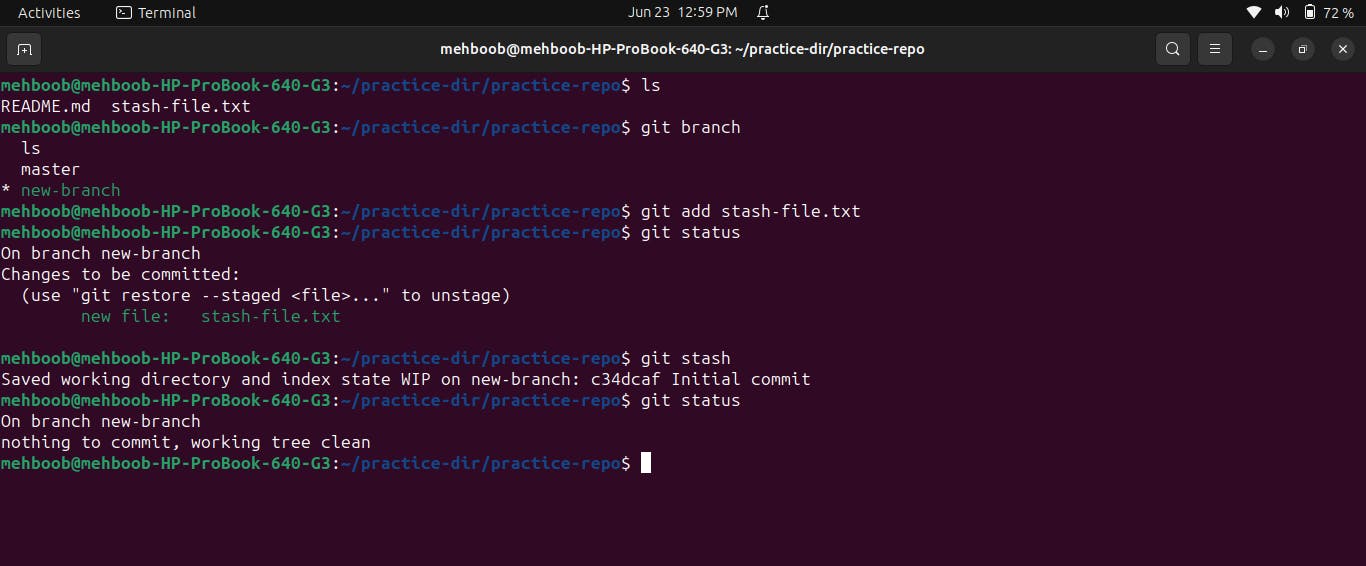
1. Git Stash:

Git Stash is a command that allows you to temporarily save changes that are not ready to be committed yet, effectively allowing you to switch to a different branch or work on a different task without committing unfinished work. This is useful when you need to quickly switch contexts but don't want to commit incomplete changes. Stashing takes the modified files in your working directory and saves them on a stack of incomplete changes that can later be reapplied. You can apply the stashed changes back to your working directory when you return to the original task.
# To save your unfinished changes temporarily using Git Stash, you can use the following commands:
git stash save "Work in progress": Creates a new stash with a message.git stash list: Lists all stashes.git stash apply: Applies the latest stash and keeps it in the stash list.git stash pop: Applies the latest stash and removes it from the stash list.git stash drop: Removes the latest stash without applying it.
Example:
$ git stash save "Work in progress"
$ git stash list
$ git stash apply
2. Cherry-pick:
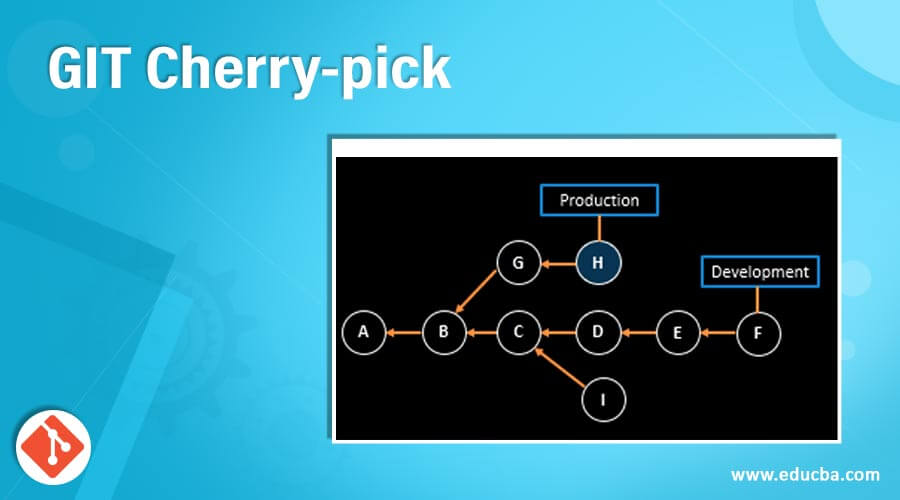
Cherry-picking is a Git command used to select and apply a specific commit from one branch onto another branch. It allows you to apply the changes made in a specific commit to a different branch without merging the entire branch.
This can be useful if you want to selectively bring in changes from one branch to another or if you need to apply a hotfix made on a different branch. Cherry-picking creates a new commit on the target branch, identical to the original commit being cherry-picked, capturing the changes made in that commit.
# To apply a specific commit onto another branch using Cherry-pick, follow these commands:
git cherry-pick <commit-hash>: Applies the changes from the specified commit to the current branch.git cherry-pick <commit-hash> -n: Cherry-picks the changes but avoids making a new commit automatically.
Example:
$ git cherry-pick ABC123
3. Resolving Conflicts:
When working with version control systems like Git, conflicts can occur when merging or combining branches that have made different changes to the same file(s) or lines of code. Git provides tools to help you resolve these conflicts.
The conflict resolution process involves manually examining the conflicting files, identifying the conflicting sections marked with Git conflict markers (<<<<<<<, =======, >>>>>>>), and making decisions on how to merge the conflicting changes. Typically, you review the conflicting changes, make necessary edits to resolve conflicts, and then mark the conflicts as resolved using git add command. After resolving conflicts for all affected files, you can complete the merge or continue with the operation that was interrupted by the conflict.
When you encounter conflicts while merging or pulling changes, you can resolve them using the following commands:
git merge: Performs a merge operation between branches.git pull: Fetches changes from a remote repository and merges them into the current branch.git status: Shows the files with conflicts.Manually edit the conflicting file(s) to resolve conflicts.
git add <file1> <file2>: Marks the resolved file(s) as staged for the next commit.git commit: Creates a new commit to complete the merging operation after resolving conflicts.
Example:
$ git merge branch_name
# Conflicts are displayed. Manually edit the files to resolve conflicts.
$ git add file1.txt file2.txt
$ git commit -m "Merge branch_name with conflict resolution"
Task-01
Create a new branch and make some changes to it.
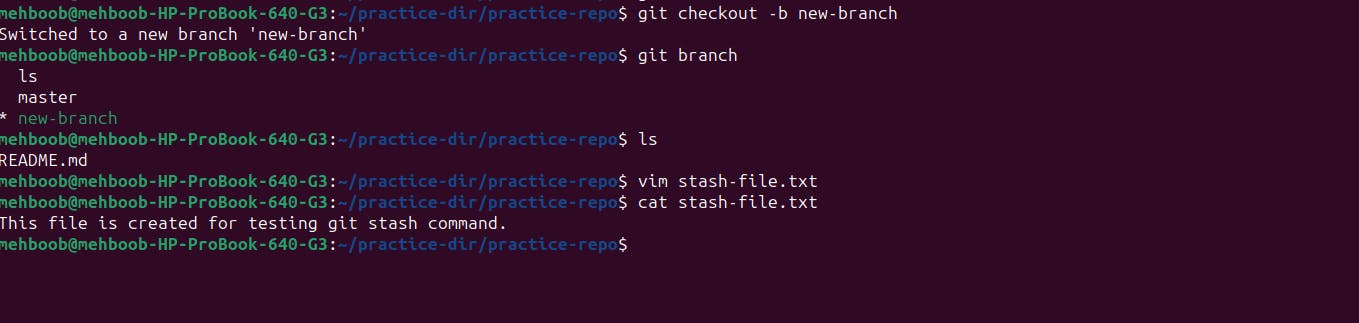
Use git stash to save the changes without committing them.
Switch to a different branch, make some changes and commit them.

Use git stash pop to bring the changes back and apply them on top of the new commits.

Task-02
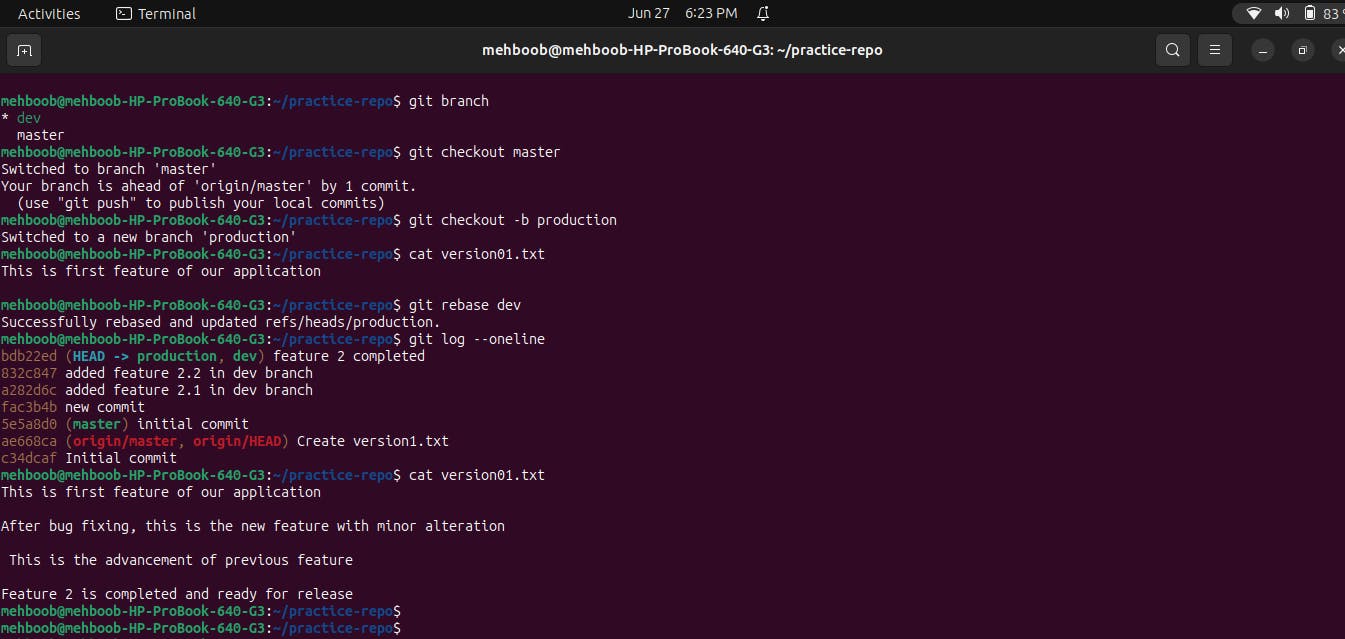
In version01.txt of development branch add below lines after “This is the bug fix in development branch” that you added in Day10 and reverted to this commit.
Line2>> After bug fixing, this is the new feature with minor alteration”
Commit this with message “ Added feature2.1 in development branch”

Line3>> This is the advancement of previous feature
Commit this with message “ Added feature2.2 in development branch”
Line4>> Feature 2 is completed and ready for release
Commit this with message “ Feature2 completed”

All these commits messages should be reflected in Production branch too which will come out from Master branch (Hint: try rebase)
.
Task-03
In Production branch Cherry pick Commit “Added feature2.2 in development branch” and added below lines in it
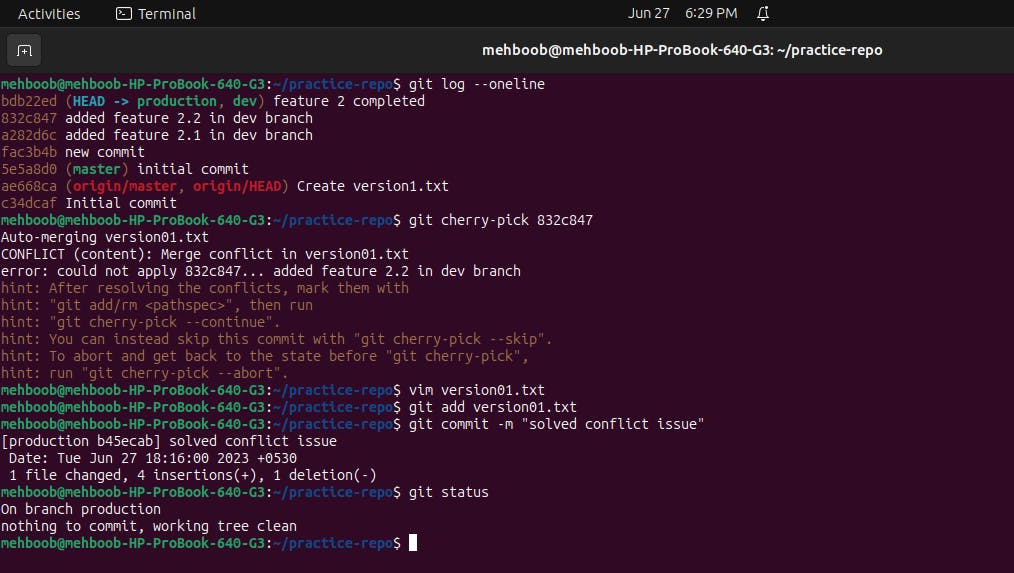
- Line to be added after Line3>> This is the advancement of previous feature
- Line4>>Added few more changes to make it more optimized.
- Commit: Optimized the feature


Thank you for reading,